
Create Depth of Field in Photoshop
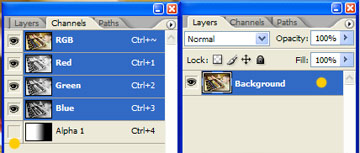
Open your desired image in Photoshop (CS or CS2) , Then go to your layer palette and click channels (in the top)
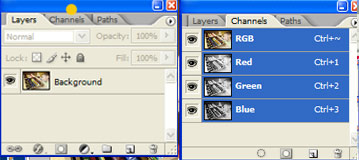
At the bottom of this channel palette there is an icon named “create new channel” it is a square icon with the shape of a folded sheet , Click it
The Alpha 1 layer will be added and your image will turn into black cause the RRB channel is not selected anymore , So select visualize the RGB

>> Step 2
(Create a gradient )
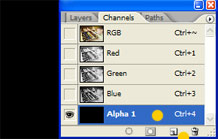
Now we have our image under this red layer , the red means the area of the new “ alpha 1 layer “ and it also means the area the will not be affected by the blur lens effect . So next we need to add a gradient to erase part of the alpha channel and to get our blur area
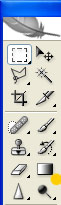
So activate your gradient tool in the tool panel and your make a gradient
The gradient start point has be over 20 % inside your focused desired object , and the end pont is edge of your pic.
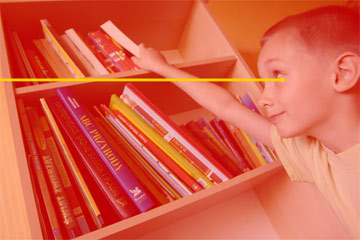
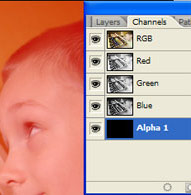
it should look like this

>> Step 3
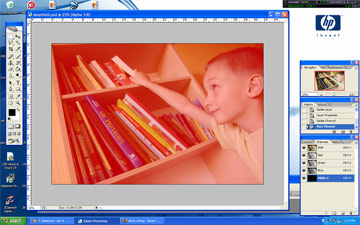
(Add Lens Blur Filter to the Background Layer )
A)
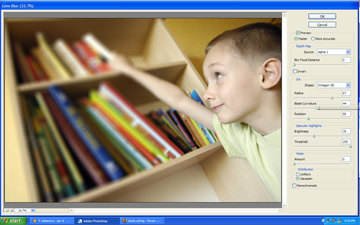
First you have to turn off he visibility of the “alpha 1 layer “ and select the RGB channel , then go to your layers palette , and select the Background Layer
B)
Next open the Lens Blur Filter panel ( Filter / Blur / Lens Bur )
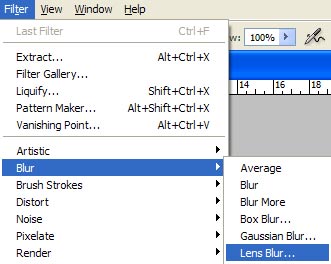
In this panel selct “alpha 1” in the source box ,this is the name of the layer we have just created , if you named the layer differently it will appear as you named it
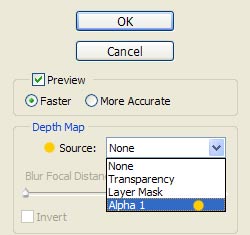
Now play with the radius scale to add the desired lens blur to your image .
–If you want to invert the blur click the invert box
Note : if you see a black and white gradient instead of your image , it is because you , didn’t select the background layer or because you didn’t deselect the channel layer we created . In case this happened , click cancel and repeat step 3

we’ve finished click okay and that was all !!!
Comments