Create a new document in photoshop around size 400 x 400 Pixels.
|
|
Use the Paint Bucket Tool to fill the entire canvas black.

|
|
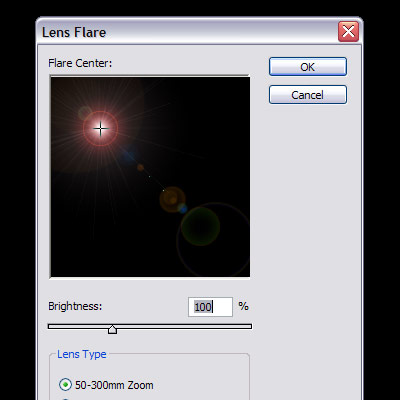
Now, Go To Filter > Render > Lens Flare, And Create A 50-300mm Zoom Flare, Anywhere On The Page
|
|
Repeat Step 3 Several Times So That You Have 4 Or 5 Flares Across the Screen.

|
|
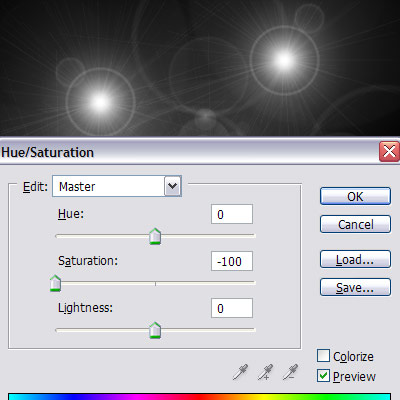
Now Press Ctrl + U To Bring Up The Hue/Saturation Box, And Set The Saturation to -100.
|
|
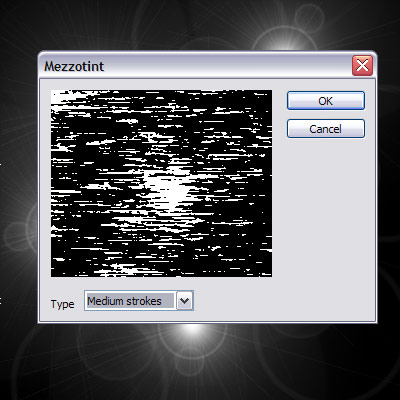
Next We Go To Filter > Pixilate > Mezzotint And Use The Setting Of Medium Strokes.
|
|
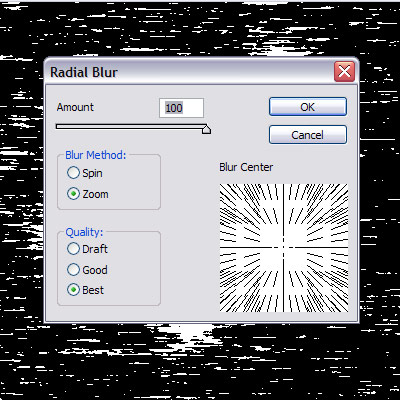
Next Go To Filter > Blur > Radial Blur And Use The Settings In The Picture Below.
|
|
Press Ctrl + F This Will repeat the last step again and blur the image even more. |
|
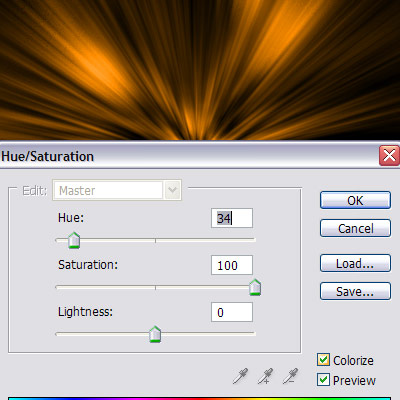
Now Press Ctrl + U To Bring Up The Hue/Saturation Box, And Use These Settings In The Picture Below.
|
|
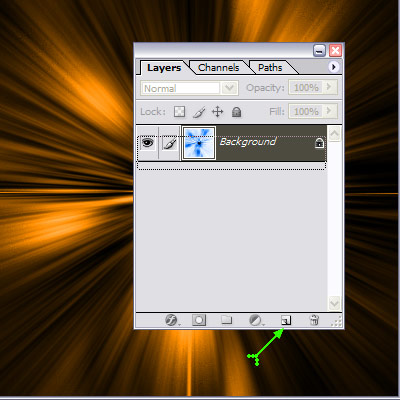
Now Select The 1st Layer, And Drag It Into The New Layer Button.
|
|
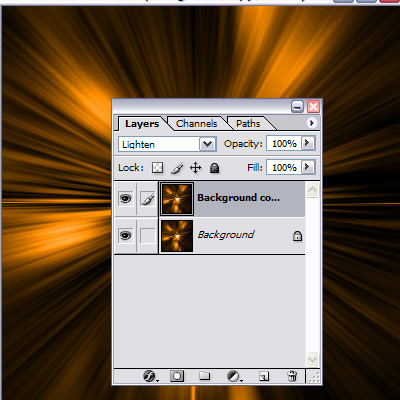
Next Set The Blending Mode Of This New Layer, To Lighten.
|
|
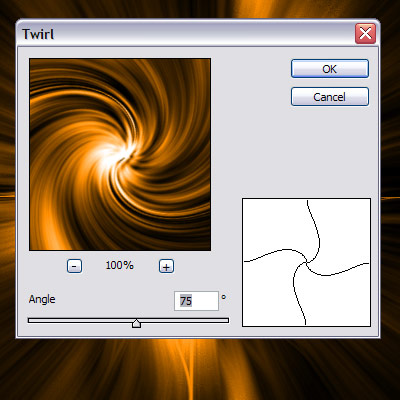
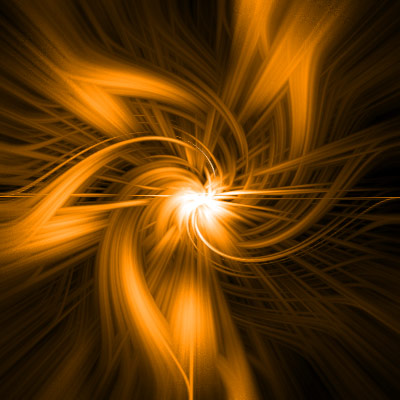
Now Go To Filter > Distort > Twirl And Use A Setting Of 75.
|
|
This Is What I Got For A Result, But You Can Alter Step 12 To Your Liking. In fact, you don’t Have to Use The Twirl Effect, You Can You Almost Any Filter Found in Filter > Distort >, The Wave Filter, And ZigZag Filter, Both produce Great images as well.

|
|
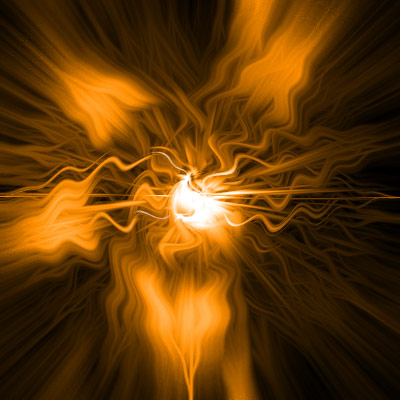
Final product is below.
|
Comments


Comments