
Wild Flower Picture
1) Firstly we open a new document (400×400 with a white background). Now select the ‘Gradient Tool’ (make sure your color pallet is set to default, i.e. black and white) – now using the ‘Gradient Tool’ drop and drag it from the top of the image to the bottom.

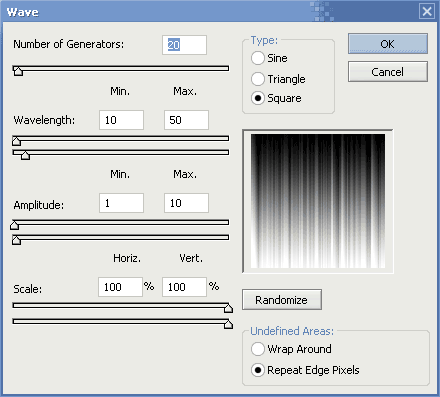
2) Now click ‘Filter’ > ‘Disort’ > ‘Wave’ and enter these values into the dialog:
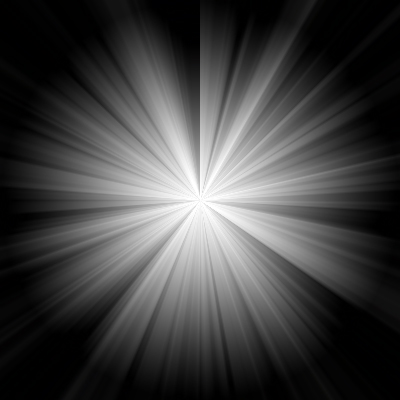
3) Click ‘Filter’ > ‘Disort’ > ‘Polar Coordinates’ select ‘Rectangular to Polar’ and click ok.

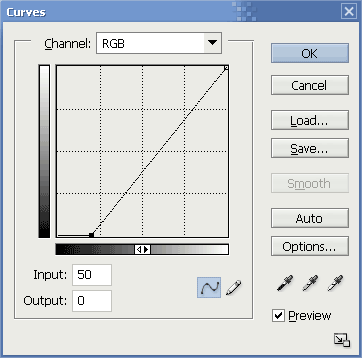
4) Hold and press ‘ctrl + g + m’ – this will bring the ‘Curves’ dialog up. Enter these values:
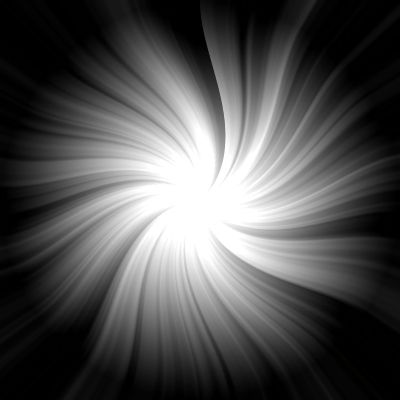
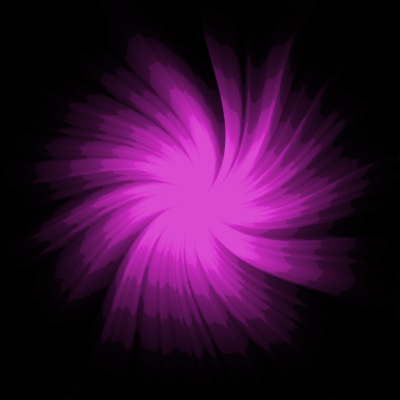
5) Now we give it a twirl effect – ‘Filter’ > ‘Disort’ > ‘Twirl’ leave it as 50 (this is the default number) and click ok.
6) Duplicate the layer and set it’s mode to: ‘Soft Light’ then click ‘Filter’ > ‘Artistic’ > ‘Cut Out’ and enter these values:

7) Merge your two layers together using ‘ctrl + e’ – then to add color to our flower we use ‘ctrl and u’ – which brings the hue/saturation dialog, enter any values. You should have something like:
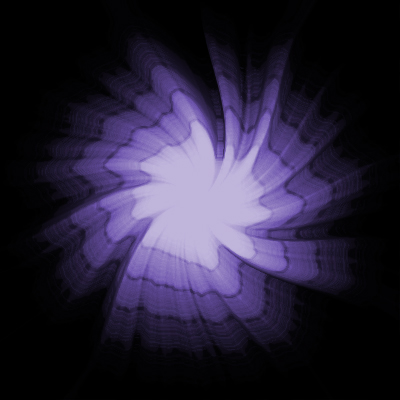
8) Duplicate the layer and click ‘Filter’ > ‘Brush Strokes’ > ‘Accented Edges’ and the values: Edge Width:2; Edge Brightness:0; Smoothness:15.
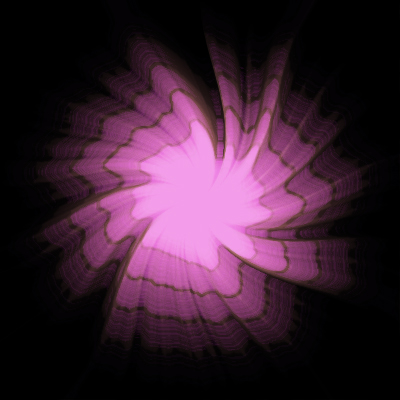
9) Last merge the layers again (‘ctrl + e’) – and again to add a better color we hold and press (‘ctrl and u’) – change the settings to your like, and click ‘ok’. You should have something that looks exactly like mine, besides the colors.
Comments