
Make a new photo to look older
Use your favorites photos
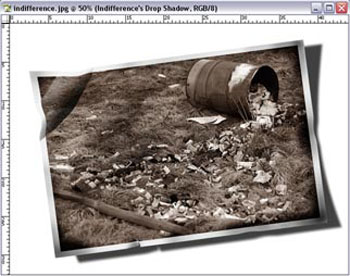
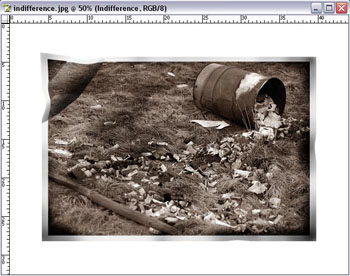
The result should look something like this:
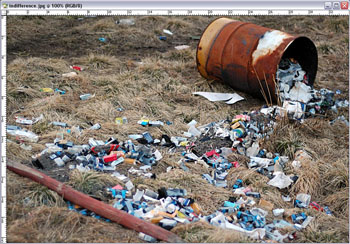
1. Open a picture you wish to ruin. You can use the picture I use to get the feel of this and later try with one of your own. Press D-letter [d] (I use the brackets from now on to demonstrate the keys needed to press) to change the foreground colour to black and background to white (a good point to start every new task).
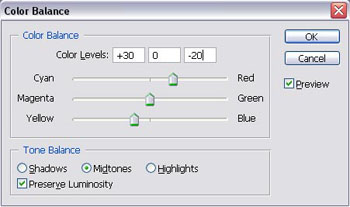
2. We start this by making the picture to look oldish sepia. Desaturate the picture [shift+ctrl+u] and modify the colour balance [ctrl+b]. Adjust the red to +30 and the blue to -20 (the three input fields represent the RGB values). Tick the midtones and preserve luminosity if they’re not already chosen.

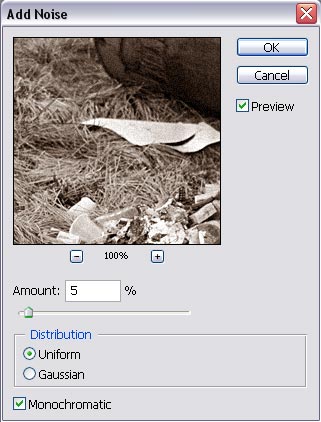
3. Add some noise to the picture to replicate old film grain. select filter – noise – add noise. Match the settings to the screenie (5%, uniform, monochromatic), or experiment to suit your eye.
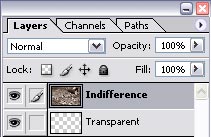
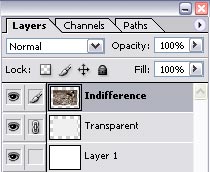
4. Now we will rearrange the layers to ease the task ahead. If the picture layer is locked, copy it by dragging it to the new layer icon at the bottom of the layer window (and delete the original). Add another empty layer beneath the unlocked picture. It should look something like this:
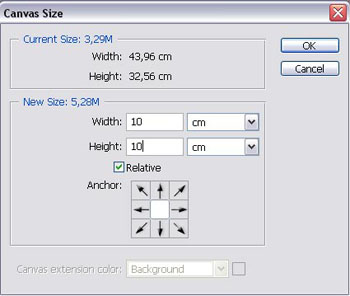
5. Now we need to make those famous white borders to the image. We could just draw on top of the picture, but that wouldn’t be satisfactory since it’d just end up cutting the pic we are so proud of. We need to increase the canvas size beneath the picture to gain some room to work in. Select Image – Canvas Size and add plenty a room to work with. I added 10cm to both width and height.
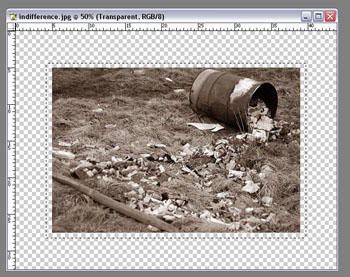
6. Keep the transparent layer selected and draw a selection with rectangular marquee tool which is a bit larger than the original image (look at the picture).
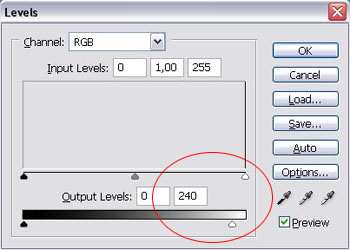
7. press [ctrl+backspace] to fill the selection with white colour and then remove the selection by pressing [ctrl+d]. Then adjust the layer levels [ctrl+l] and move the light side slider to approx 240 (see the picture).
8. Now we need to make another empty layer to the picture. Put the new layer to the bottom and fill it with white colour [ctrl+backspace]. Now select the picture layer and click the chain to link it with the gray border layer and press [ctrl+e] to merge them (look the picture). Now is a good time to make a snapshot of the work.
9. Make a selection to the picture, similar as in the screenie. Now press [ctrl+j] to copy the selection to a new layer.

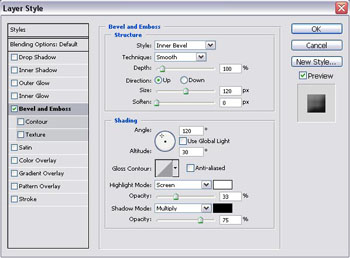
10. Click the “Add a layer style” icon in the layers window (the little black rounded with ‘f’ in it). Adjust the bevel and emboss to following settings:
11. Take a brake, go get some coffee or something, ’cause now the fun starts ;o)
12. Press [shift+ctrl+x] to liquefy the piece a bit. Use the Forward warp tool [w] (topmost) and resize the brush to approx similar width of the picture to create a 3D effect to the folding. Don’t overbend it, less is more. After you’re satisfied click ok.
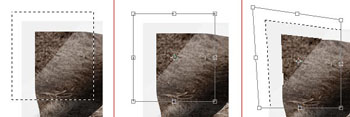
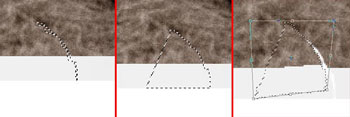
13. Now we will bend the corner to simulate folding. Select the picture layer and draw a selection to the corner (picture a). press [ctrl+t] to apply a free transform (picture b) and drag the outer corner upwards while pressing CTRL key simultaneously (picture c). Deselect by pressing [ctrl+d].
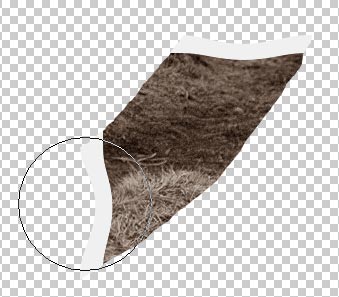
14. Erase all extra white leftovers from the picture layer from below of the fold (picture). Merge the folding layer to the main picture layer after that.

15. Select the Burn tool from the tool menu [o] and burn the image a bit (picture).
16. now we will make a rip to the picture. Select area using a lasso tool (picture a). Press [ctrl+j] to copy the selection to the new layer, and press [ctrl+backspace] to paint it white. Ctrl-click the new layer to remake the selection and select the picture layer from the layers. Use polygonal lasso to select similar “triangle” as in the picture (picture b). Press [ctrl+j] to copy the selection to the new layer. Now select the new layer and press [ctrl+t] to apply a free transform to it (picture c). Erase all leftovers again, and merge layers. Burn the rip a bit.
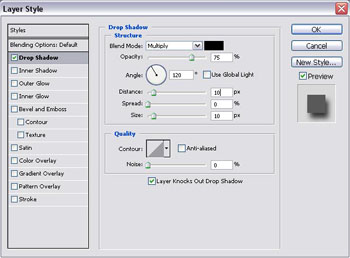
17. Now we need to make a shadow, but first lets turn the image a bit. Make sure you have merged all the layers except the white background. Select the picture layer and press [ctrl+t] to turn the picture around (the bended double headed arrow appears when you put the mouse’s cursor below the middle dot. press mouse button and move mouse to turn the picture). Now, click the Add a layer style icon and add a drop shadow. Match the settings to mine. After you click the ok select Layer – Layer Style – Create Layer, this will create a new layer for the shadow. When the warning screen appears, just click ok.
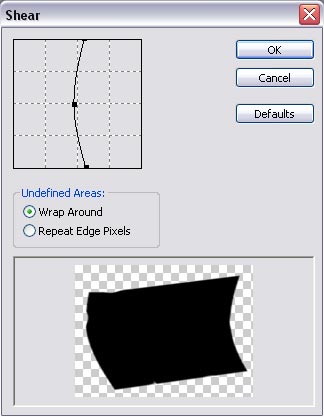
18. Select (click it) the shadow layer from layers. Choose Filter – distort – shear (picture). Then move the shadow to a right a bit.
19. Voilá:
Comments