
Wireframe Effect
1. Start a new image whatever size you want background colour transparent, I used 800×600, then hit D to change colours to black and white.
2. Go to Filter–> Render–> Clouds.
3. Then go to Filter–> Pixelate–> Mosaic, Cell size between 15-20.
4. Go to Filter–> Blur–> Radial Blur, Amount: 20 | Blur Method: Zoom | Quality: Best.
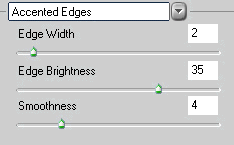
5. Go to Filter–> Brush Strokes, Accented Edges | Edge Width: 2 | Edge Brightness: 35 | Smoothness: 4.
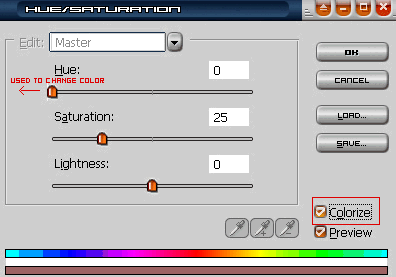
6. Go to Filter–> Stylize–> Find Edges, Then hit Ctrl + I to invert the colours. 7. Change colours by hittng Ctrl + U check the colorize box and use any colour you want.
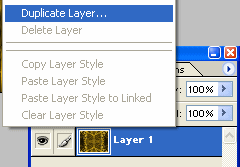
8. Duplicate the layer by right clicking on the current layer and clicking “Duplicate Layer” and press OK

9. On the new layer go to Filter–> Distort–> Polar Coridnates use the polar to rectangle setting.
10. Duplicate thie layer. Go to Edit–> Transform–> Flip Horizontal.
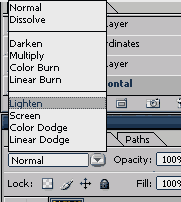
]Then set this layer to Lighten.
11. Merge the top two layers by holding Ctrl + E.
12. Duplicate this layer again. Go to Edit–> Transform–> Flip Vertical and set this layer to Lighten also like in Step 10. Then merge the layers by holding CTRL + E.
13. Duplicate the newly merged layer and go to Edit–> Transform–> Rotate 90° CW. Set this layer to Screen or Lighten.
14. Go to the 2nd layer and change it to Screen or Lighten also.
15. Grab the Eraser Tool and set the opacity low to make it very soft so you can delete the hard lines from the top layer. Try to get everything to where the lines flows toghether to make it look smooth..
16. Merge the top two layers by holding Ctrl + E.
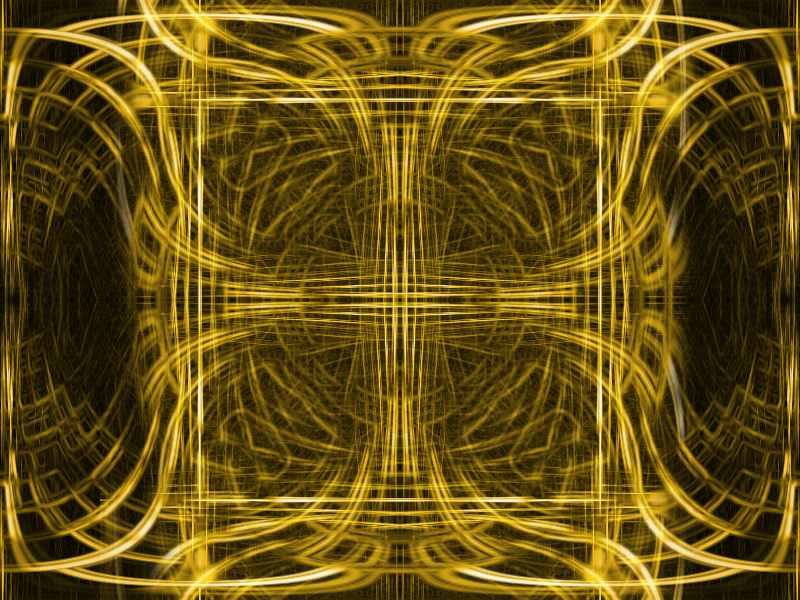
Well, your done and learned how to make this wireframe effect! Below is an example of a finished product.
Comments