
Rumpled Picture Effect in Photoshop part 2
Now what we want to do is to distort our image so that it crumples along with the texture of our paper effect.
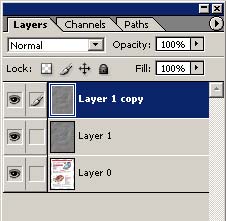
1. Go to Layers palette and drag your paper layer over the “New Layer” icon to create a duplicate layer. You should now have three layers visible in your palette.
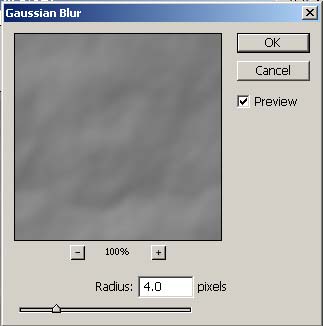
2. Apply a Gaussian Blur to your new layer. Why? Well, we’re going to use our new layer as a displacement map, but we don’t want too much texture in the displacement or the image will look horrible. So apply a blur of about 4.0 pixels.
3. Now save a copy of your project in the .PSD format (Command-Option-S on the Mac).

4. Go back to your Layers palette and hide the two texture layers, and select the layer containing your original image.

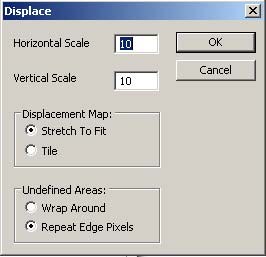
5. Choose Filter > Distort > Displace. Adjust your setting to match those seen below.
6. When the second dialog box pops up, select the copy of your image you created in Step 3. After doing this, here’s what your image should look like at this point.
Now we’ll go and clean this puppy up to make it look right.
Comments