Create rectangles for the navigation scheme
June 18, 2006 | 0 comments
Create rectangles for the navigation scheme
Once you know what your links will be and where they will lead, you are ready to sketch the site navigation scheme in FreeHand 10.
| 1 | In FreeHand, create a new file by selecting File > New. |
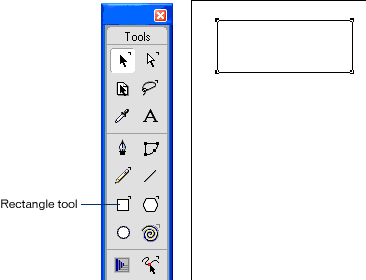
| 2 | In the Tools panel, click the Rectangle tool and drag a rectangle on the page.
|
| When you release the mouse button, the new rectangle will be selected. Leave the rectangle selected so you can alter its properties. | |
| Note: For this tutorial, we’ve drawn a rectangle that is 135 pixels wide and 52 pixels high. You can view and set the exact dimensions of a rectangle in the Object inspector (Window > Inspectors > Object). | |
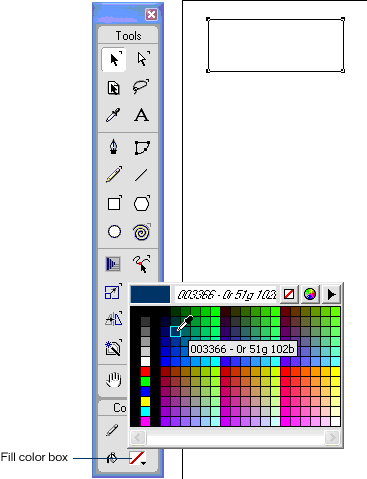
| 3 | In the Tools panel, click the Fill color box and select a color from the pop-up color palette for the inside of the rectangle. For this tutorial we’ve chosen dark blue (003366) for the rectangle’s fill.
|
| 4 | With the rectangle still selected, click the Stroke color box, and select a color from the pop-up color palette for the outline of the rectangle. The Stroke color box is above the Fill color box in the Tools panel. For this tutorial we’ve chosen a lighter blue (0099FF) for the rectangle’s stroke. |
| 5 | Save your document (File > Save) as navigation.FH10. Remember to save your work often as you make changes to your document. |
| 6 | With the rectangle still selected, copy the rectangle to your clipboard by selecting Edit > Copy. |
| 7 | Paste a copy of the rectangle onto the page by selecting Edit > Paste. |
| A copy of the rectangle appears at the center of the page. | |
| 8 | Paste another rectangle on the page by selecting Edit > Paste. This time it will appear that no new rectangle is pasted. This is because the pasted copy appears directly above the rectangle at the center of the page. To move the new rectangle, click the Pointer tool in the Tools panel (the solid arrow in the top left corner), and drag the new rectangle. The rectangle you pasted moves across the page as you drag. |
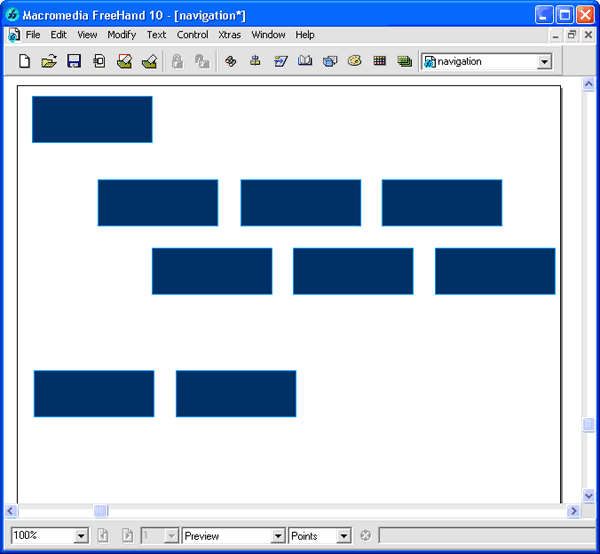
| 9 | Continue to paste rectangles (Edit > Paste) until you have nine rectangles on the page. You may need to drag the new rectangles to different locations on the page each time you paste them. |
| 10 | Once you’ve created nine rectangles, use the Pointer tool to drag and position them as they’re positioned in the diagram below.
|
| This arrangement will serve as the basis for your site’s navigation scheme. |


Comments