
Warped Effect for Proffesional Background
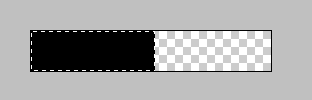
1. Start a new document with 60×10 and select Transparent

2. Use the rectangular marquee tool and draw a 30px by 10px selection on your canvas. Then fill it with black. Now, go to Edit->Define Pattern.
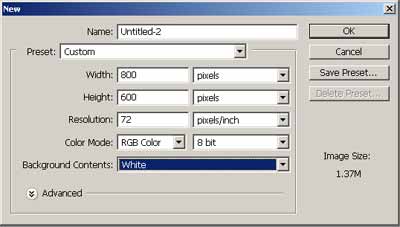
3. Create a new document 800×600 with white content

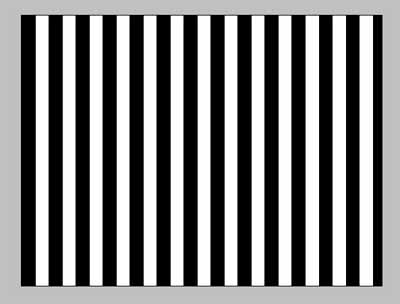
and create a new layer, then go to Edit->Fill and use Select Pattern, and in the Custom Pattern options, select the pattern you just created in the previous step.
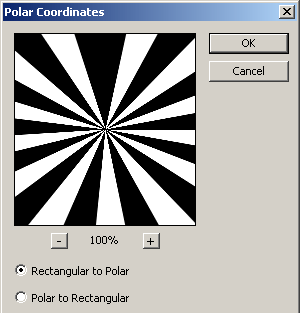
4. Apply the polar coordinate filter. Filter->Distort->Polar Coordinates
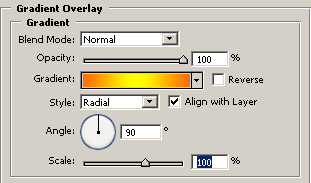
5. Now apply this gradient overlay layer style to the layer.
6. Create a New Layer, link the new layer and this layer together, then go to Layer->Merge linked

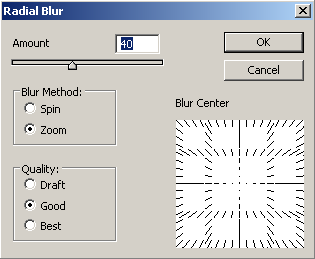
7. Duplicate this layer. Change the Blending Mode to “Multiply” and go to Edit->Transform->Rotate Then just rotate this layer by just a few degrees to offset it from the original. Repeat the above 2 steps, several times but change the Blending mode to “Overlay” and “Screen” and “Normal”. 8. Now link all the layers together (except the background) and go to Layer->Merge Linked. Applied Filter->Blur->Radial Blur
My Results:

Comments